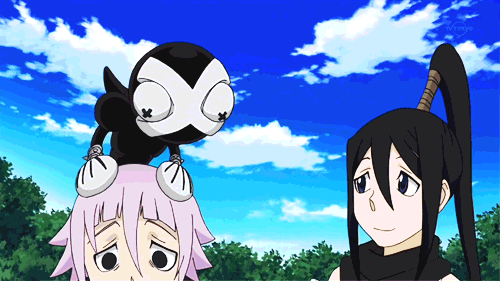
Malgosia Bela and Tim Burton by Tim Walker for Harper’s Bazaar US October 2009
|
I've been inactive from modelling for about a year now because of starting university and getting a job, but recently I've done a couple of shoots for friends for their uni projects! Here's a photo taken by Rachel Luckley Photography for her project on alternative portraits! I should hopefully be doing a few more photo shoot for friends over the next year and I'll be posting the results here! Enjoy! :) 
Lolita is a Japanese fashion subculture with heavy Victoria influences which has also spread across most of Europe. The look generally consists of, but is not limited to, a knee length, bell-shaped skirt, huge petticoats, a high neck blouse, cute tights, stockings or knee high socks, and platformed shoes. Over the years the look has grown and evolved into different sub styles within the subculture. There has been a lot of speculation to do with lolita fashion and sexuality due to the 1955 controversially erotic novel, Lolita, written by Vladimir Nabokov, which is based around an underage girl and her sexual attraction and involvement to an older man who becomes her stepfather. However, many lolita's have protested that their look is strictly not meant to provoke any form of eroticism or sexual attraction, and that they aim to present themselves with modesty, and strive to appear cute and elegant. They also claim to feel like, by dressing this way, they have a certain sense of ownership of their sexuality and body. There is definitely, however, an underlying fetish when it comes to the "cute", "under-aged" look, especially when related to the Asian schoolgirl, which many view as a racist fetish. Different lolita sub styles; Sweet Lolita: The most popular and well known of the lolita sub styles, sweet lolita has heavily Victorian and Edwardian influences, with cute themes running throughout the clothing and accessories. Light, pastel colours are commonly used, with childlike motifs and accessories, and generally light coloured hair and makeup.  Gothic Lolita: Similar to the sweet lolita silhouette, but the main difference being a predominant use of black and dark colours, gothic lolita is characterized by dark makeup and morbid accessories.   Elegant Goth Lolita/Aristocrat: Influenced by gothic lolita, aristocratic fashion and steampunk, EGL (or EGA) has a more mature look of all the lolita sub styles. It has heavy Victorian influences with emphasis on formality and elegance. The silhouette generally consists of long skirts and tight-fitting, long-sleeves blouses. The colour pallet consists of dark colours and neural tones. The outfits are completed with ruffles, lace trimmings, clunky books and heavy makeup. Corsets, gloves, waistcoats, stockings, bows and top hats are also common accessories.  Classic Lolita: Inspired by Regency and Victorian fashion, classic lolita is a fusion between gothic and sweet styles. The use of muted colours, intricate patterns and more functional shoes and accessories make the designs more appealing to those striving for a more sophisticated and mature lolita look.  Guro Lolita: Inspired by contrasting gore and innocence, guro lolita heavily portrays the "broken doll". The use of white clothing expresses the "innocence" and "purity" and the use of fake blood creates the contrast of gore and horror.  Punk Lolita: Inspired by 1970's punk fashion, Camden Town and Vivienne Westwood, punk lolita adopts certain elements from these influences and combines them with lolita fashion. Clothing is often ripped and tattered, covered with motifs and safety pins, and androgynous hairstyles are adopted. Other lolita sub styles: Princess Lolita, Casual Lolita, Country Lolita, Ōji Lolita, Sailor Lolita, Qi Lolita, Shiro & Kuro Lolita, Wa Lolita I've already been planning my next cosplay project as I've wanted to do this one for quite a few months and I'm finally figuring out how it do it, and I think it may be quite simple!
I will be starting this cosplay once my Pennywise costume is finished and I get my student loan through so I can afford the materials! Adiós! :)
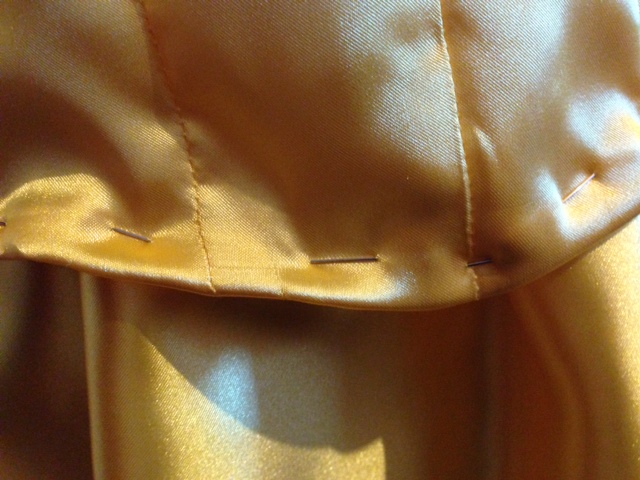
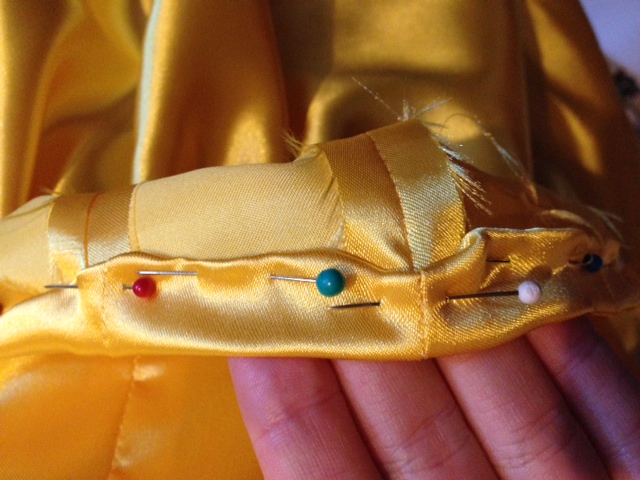
After I added a zip to the back of the top and the back of the skirt, I hemmed the bottom of the skirt and pinned the hem up on the top, which is ready to be sewn, I just need more yellow thread!
Next I will be working on a little jacket similar to Pennywise's, so stay tuned!
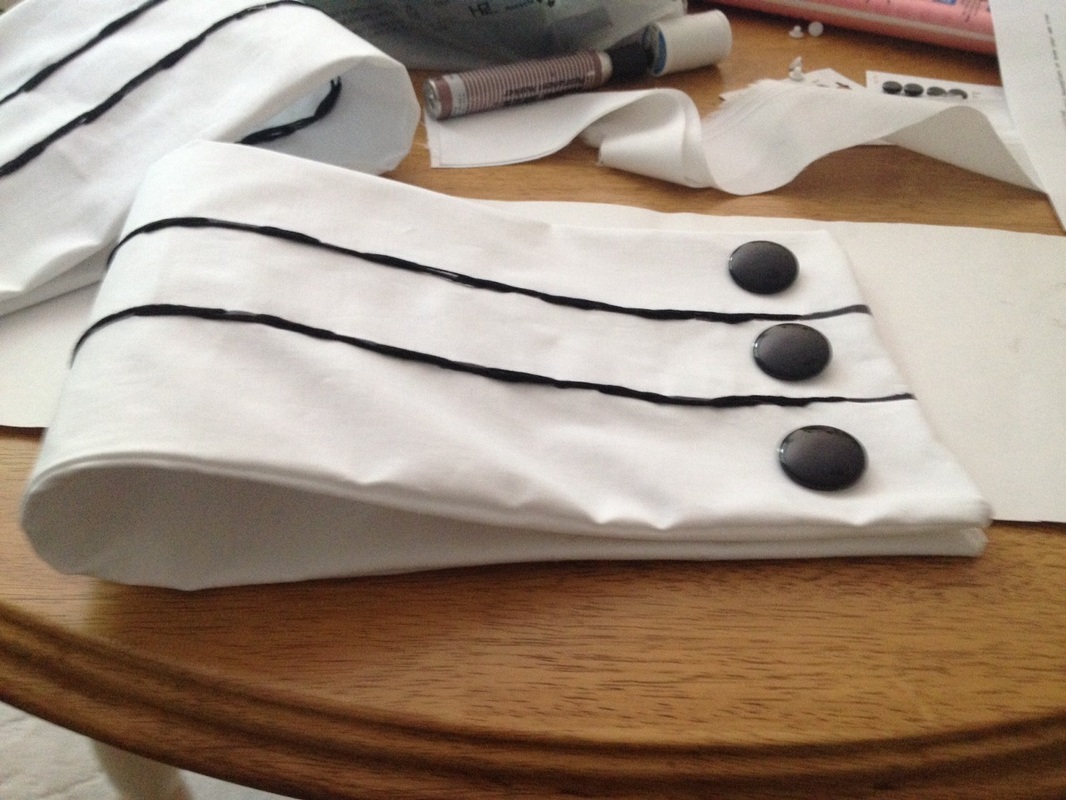
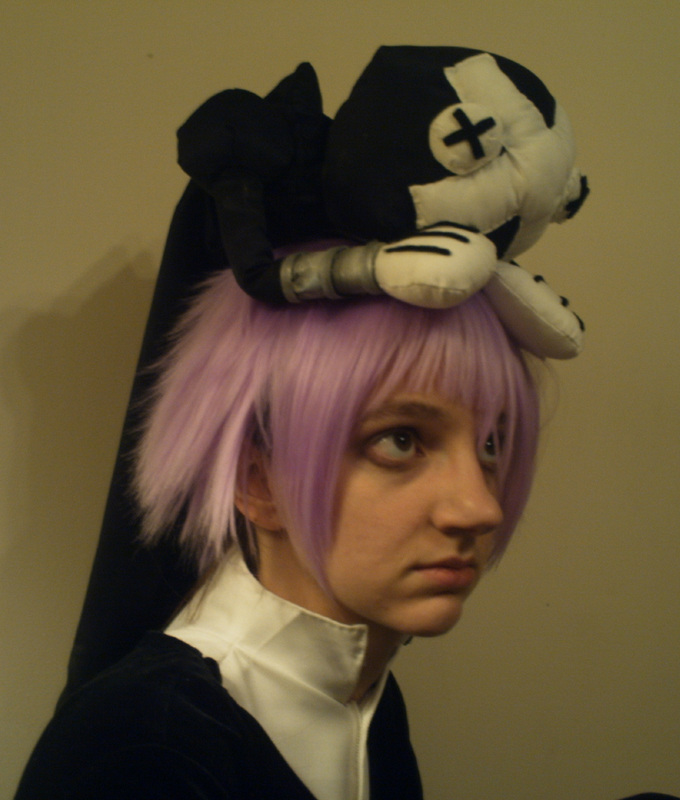
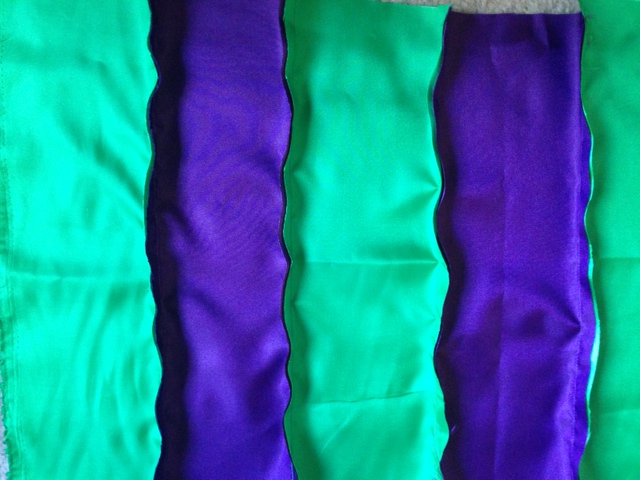
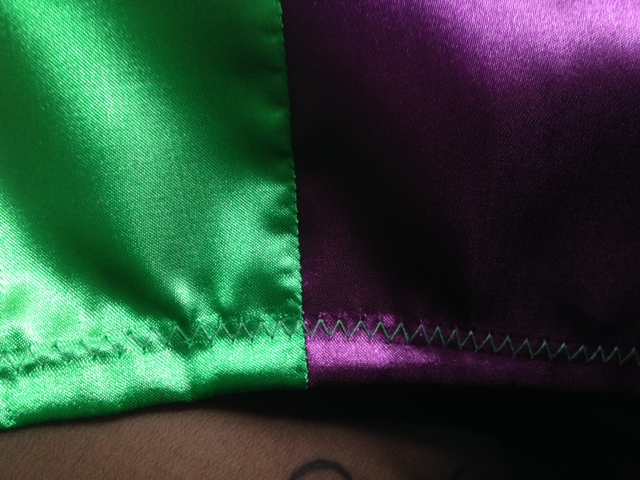
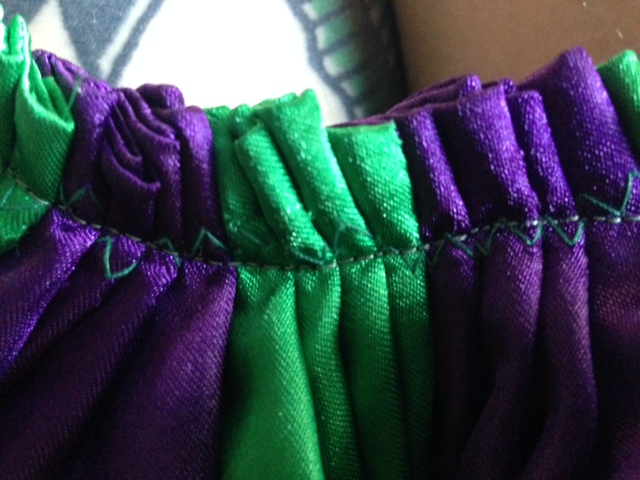
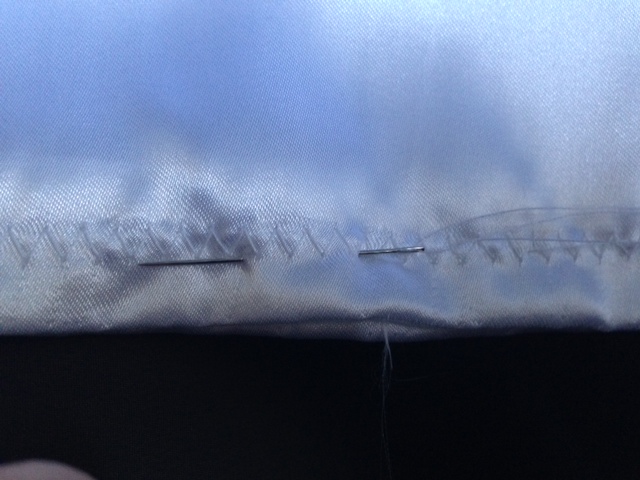
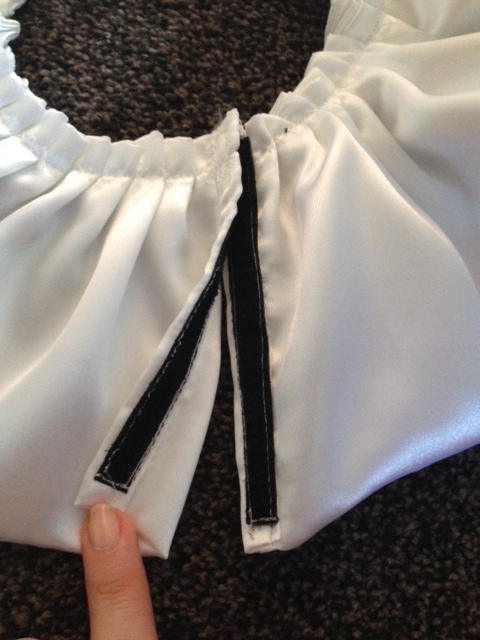
It's pretty clear due to my other posts that I am terrible for remembering to take photos of my work. I always get halfway through what I'm doing and then have to try and backtrack and take a load of photos to make up for what I've missed out. And that's exactly what happened the other day when starting my Halloween costume. Anyway; I went to a local haberdashery and fabric store to pick up some supplies to get me started! I picked out a cheap satin material, much like the type you'd see clowns wearing, which was my theme! I chose a yellow for the top and skirt, purple and green and white for the ruff and whatever else I decide to make to add to the look. I found some little orange pompoms for 15p each! And I picked up some red trimming to go along the bottom of the skirt and 2 zips. I was kind of just making it up as I was going along and figured that if I decided I needed anything else I could always pop back for more supplies as Halloween is another 2 months away so there's no hurry! It's just a little experimental project for now! :)  Considering I didn't take any particularly good photos I'll just try to explain what I did! I used the corset pattern I made a while back at university and have talked about in previous posts and just added an extra large seam allowance around all 4 edges of all of the pattern pieces. This left me room for any mistakes and adjustments and made it longer in length so it covered my top half a little bit more. I sewed it all together on my machine and took it in wherever needed so it fit tightly to my body.  Since I don't own an over-locker yet I just made sure not to cut the seams down too far, trimmed away any snaggle threads from the fraying fabric and ironed the seams flat. I figured if I'm just careful then the seams won't fray much and I might be able to use an over-locker after hours when I get back to university, until I get my own!  Next I put the zip into the top. I always struggle a little with sewing zips in but I think this one went better than usual. I folded and ironed the seam allowance on the back, and pinned one length of the open-ended zip along the fold. I then lined up the other side and pined the other length of the zip on the other side/fold. I zipped it together to make sure the back lined up accurately with the zip pinned in place. I then took my time and slowly sewed each side of the zip in place. The bit which I seem to struggle with the most is the very top and bottom of zips. I just made sure to take my time and carefully go with the flow.  The skirt was pretty straight forward to do (although I'm not quite finished it yet as I'm not at home at the moment) All I really needed was the length of how long I wanted the skirt, the size of my waist and how much gather I wanted. I made the skirt a little extra long so I could take the length up just in case I made it too short like I have before. I cut out a long strip of fabric (length x width including room for gather) I ran two long length lines of stitches along the top of the skirt and began to slowly gather it to the size of my waist. I tied off the ends and decided to make a waistband to hide the rough gathering. I cut out a waistband 4 inches in height (as it needs to be folded over making it 2 inches), and my waist size, plus seam allowance. 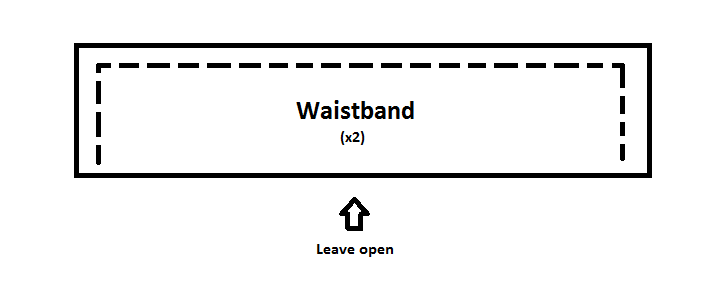 I sewed the two smaller ends up, one of the longer lengths, and then left the other long length open. I folded it back on itself and pressed it flat, also folding the seam allowance under and pressing it.  Once the waistband was folded the correct way around, I pinned the gathered edge of the skirt inside the waistband to one of the folded edges. I sewed the gathering down as a top stitch along the waistband.  Next I did the same thing on the other side, pinning the other folded edge of the waistband down so it joined up and matched the other side. 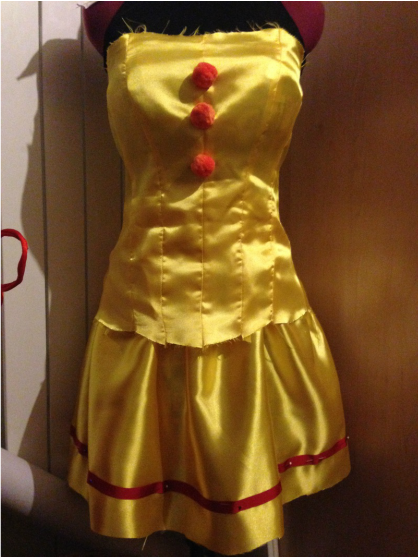 This is as far as I've gotten so far as I've realised I might need a slightly longer waistband (perhaps 2-3 cm), just to make some extra room for when wearing. I think I might have misjudged slightly when measuring and cutting it out originally. If I was to keep the existing waistband ans sew the zip in it might be a little bit snug when I wear it, especially on a Halloween night out and it might nip a little bit too much for me to comfortably drink and dance in it. I will pin myself into it and try it when I'm next home.
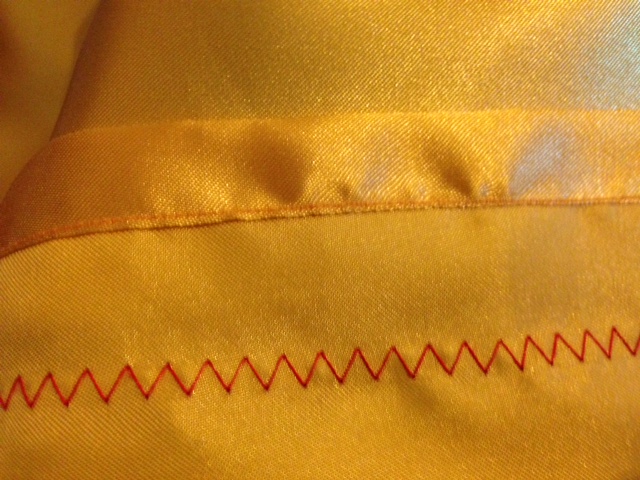
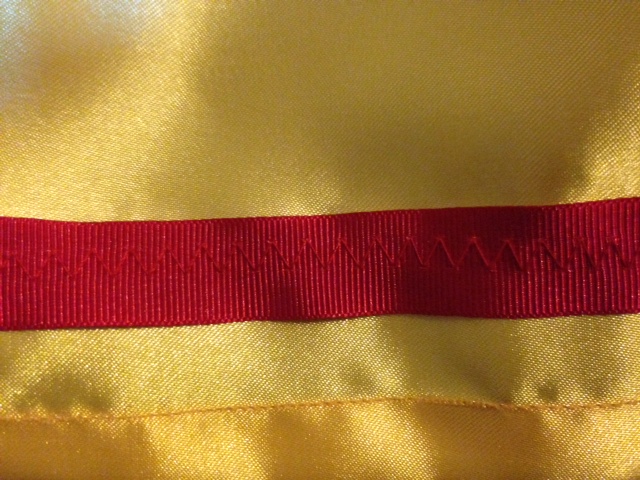
I pinned the pompoms onto the front of the top and pinned the trimming around the bottom of the skirt, just to make it look like it was coming along a bit more! I will be continuing with the costume next week when I'm home and reunited with my project! Stay tuned for more :) With Halloween being my favorite holiday I am always conflicted with what to go as. This year it was between The Bride of Frankenstein, Carrie, a creepy mime and a creepy clown! After doing a bit of searching online I went with Pennywise from Stephen King's It! 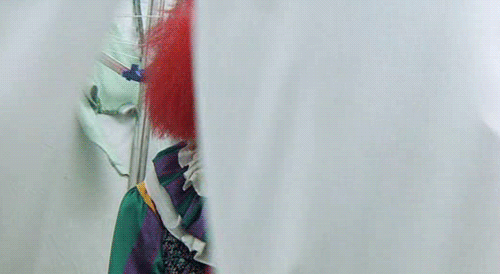
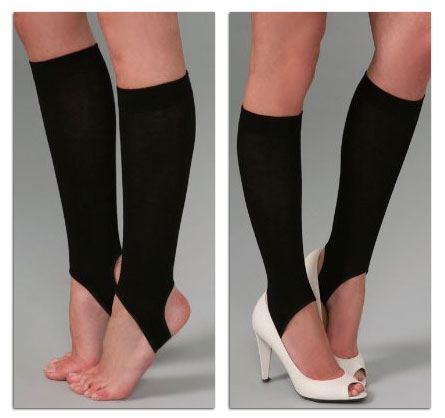
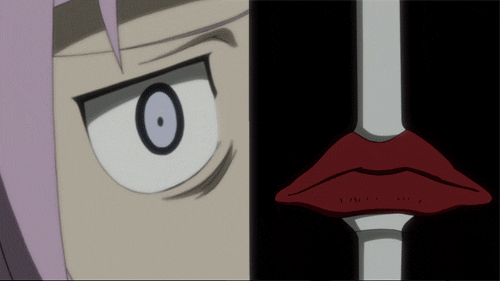
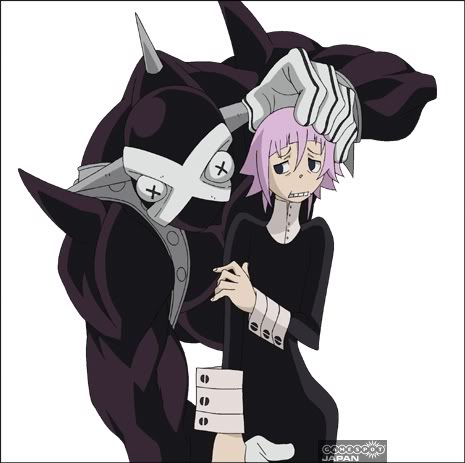
 I found this image of a female Pennywise costume on a costume hiring website and I really love it! I am considering making a similar costume in time for Halloween! I will be using the correct colour scheme to stay true to Pennywise's original look (the armbands on the left are blue and purple but the original Pennywise is green and purple). I may not include the armbands in the costume but I will wear tights or knee-high socks with green and purple stripes on instead. I will make the top from the corset pattern I made and alter it to fit myself, and the skirt should be simple enough, all I need is my waist measurement, the desired length and how much gather I want for fullness. I may also gather some yellow tulle to create the tutu effect underneath. I know I definitely want a neck ruff which I can easily make from white material and trim it in purple and/or green. I will be looking for a similar wig to wear, or buying my own red curly wig and styling it huge and backcombed. I will be doing my own makeup with a white face, defined black brows, blue eye shadow, a black line on the center lower lash line of each eye, a red nose, and extended red lips (similar to the look below). 
Stay tuned for more!
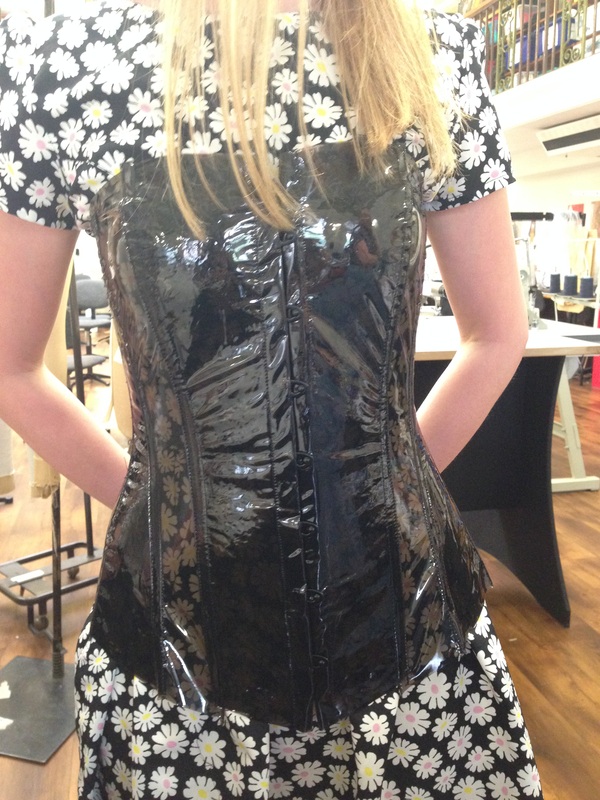
I had the choice between 2 corsets to make in the space of 4 weeks. It involved pattern drafting, altering the patterns to the model's size, mocking up a toile, fitting it accurately to the model, ordering all the required materials, and constructing the finished garment, which consisted of boning the corset, adding the busk, reinforcing the back, adding the eyelets for the lacing, binding the edges, ect. This was the corset I chose to recreate: 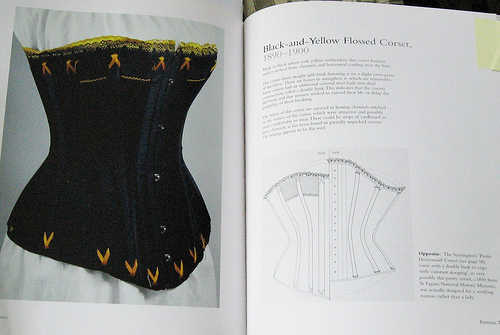
We were shown corsets of a similar style made by previous students to inspect and I took a few photos as reference for when I come to make mine (shown below). Below are a few pictures I took during the process of drafting and toiling the corset. When it came to working on the final product, I chose a transparent plastic/pvc material I bought from The Cloth House in London to use. I intended to sandwich one piece of black lace between 2 sheets of plastic, but after trying this with a test sample of lace I realized that I would need a light coloured lace as the black lace didn't give the desired effect I was after, it just completely blacked out the transparency of the plastic and the lace wasn't visible and therefore pointless. So when I cut out the corset pieces from the plastic I sandwiched a white lace between them and began to sew the pieces together, making room for flat felled seams. I noticed the lace was making the plastic slip and gather on the machine, so after trying several different techniques, involving using a Teflon foot, I realized that using lace wasn't going to work whatsoever. I removed the lace from all the panels and began constructing the corset without it, using double the thickness of the plastic to make the garment stronger. I used 2 spiral bones in the front, alongside the busk, and 10 plastic coated bones throughout the rest of the corset. I placed 4 of the bones in the center back, one on either side of the eyelets on both sides.
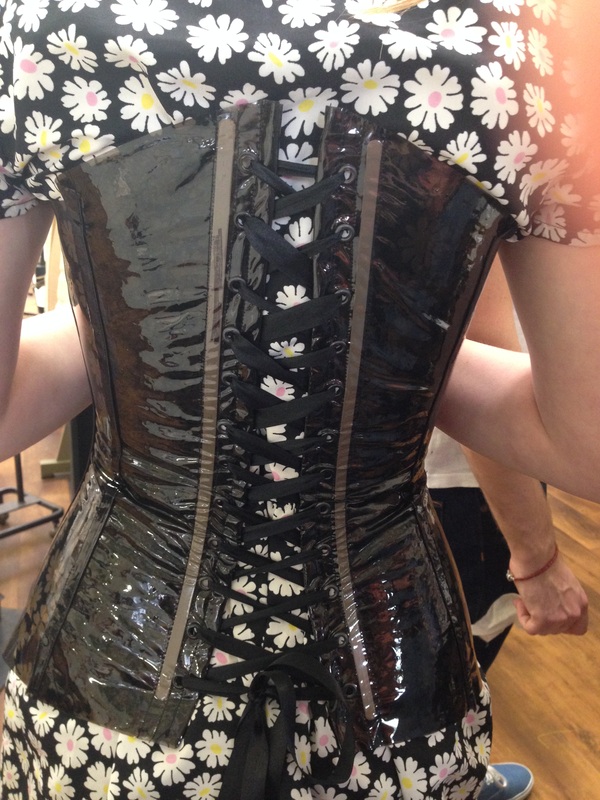
The (almost) finished product. I then took the corset home, painted the white bones black and
am still contemplating on how to bind the edges of the garment.

There were a few little mistakes I made while making this outfit, but I rectified them
the best I could and I am rather happy with the results! It's all practice! :) |
AuthorAmy Day, 20, North-East, UK Archives
November 2014
Categories |


 RSS Feed
